Saturday, 7 February 2015

I Think I Want To Sew

When I was a kid my Mom signed me up for sewing lessons. I loved them. I learned how to make clothes, actual clothes. Pants, shorts a really cute puffy blouse (I was 11). I'm not sure why I stopped taking the lessons but to this day I wish I hadn't.

About 8 years Anthony bought me a sewing machine, a very nice one, and I had every intention of taking classes and learning how to sew my own clothes and household items.

As soon as I could I went to Fabricland, I bought sewing patterns and fabric and was ready to have all that lost sewing knowledge flow into my brain and I would be off!

I am sad to report that I didn't get very far. I have very little patience, very very little patience. Following a pattern bored me but when I tried to do things how I wanted to I ended up with a mess. I didn't throw in the towel though, I just made curtains. Yes, I sewed two fabric rectangles together and hung them up proudly in my windows.

Flash forward 8 years and I have one very dusty sewing machine that I really want to take advantage of. Since I knew I could sew rectangles I thought, I can sew squares. So I found a simple pattern online and I made cloth napkins with fabric I found at a second handstore for super cheap.


 With my confidence at about a 7 I found a great tutorial for fleece mittens. I took Jack to Fabricland and had him pick out a fleece fabric he liked, which just so happened to be on sale (win) and I made mittens! I made mittens that he LOVES and wears everywhere!


Today I made placemats  for the kids. Again thank heavens for the world wide web! Another easy pattern, one that included fusible interfacing  (eep) which lead to a quick tutorial and then placemats!


One of the things I've learned from my journey towards the sewing hall of fame is if you don't have time to take lessons start small, take advantage of online tutorials and take your time. I'm still trying to take my time.  If I could wave fabric in from of my sewing machine and have it turn into a circle skirt that would be AWESOME, but I don't.

For now I will stick to the easy to handle patterns and hope that one day I will be able to take lessons and really take my sewing machine out for a spin!

Friday, 9 January 2015

Splish Splosh Apple Sauce

I loved apple sauce as a kid. As a matter of fact I still do. My kids on the other hand, they don't love it as much as I do. Max will have a bowl here and there but his life won't end if he doesn't eat any.

So why am I going to share my apple sauce recipe today? Because even though we don't eat apple sauce on its own we do go through it pretty fast. Apple sauce happens to be one of the main ingredients in the fruit roll up recipe that I use. It can also be a stepping stone if you choose to make your own baby food.

 This recipe is so easy, you don't have to add anything to it but a little bit of lemon juice and cinnamon, which, now that I'm writting this I totally forgot to add today! I still got the thumbs up from Max so all is not lost!

Here's what you will need

Apples, a bunch of apples
I used the Macintosh apples. The ones you can get already in a bag
Lemon juice
Water
Cinnamon

First thing to do is to peel, core and cut your apples.


Place your apples in a large pot, add about 2 tbsp of lemon juice and 1/2 cup of water and cook partially covered on medium low stiring here and there until the apples are soft.


Once the apples are cooked you can either mash them with a potato masher until it isn't so chuncky (unless you like it that way) or you can put the cooked apples through a food mill if you have one. I was lucky enough to be gifted a food mill for Christmas so that's what I have been using.


After you have mashed or milled the apples you can add the cinnamon to taste or forget it all together like I did.

I jar my apple sauce just so it doesn't take up room in the fridge.


You can do this if you like but it's usually fine in the fridge for a couple of weeks depending on how much you make. You can also freeze it in ice cube trays if you are using it as baby food.

I ended up with about 11 cups of apple sauce.

The great thing about this recipe is that it's incredibly simple and easy to play with. If you don't want 11 cups of apple sauce, don't use so many apples.  If you would like it a bit sweeter then add some honey or brown sugar. The possibilities are endless!

Enjoy!


Friday, 2 January 2015

Pancakes for breakfast anyone?!

Pancakes.  Pancakes are a very serious business in our family and have been since I was a kid. There's nothing better then a fluffy pancake to start your day off or to end your day with. Who doesn't love breakfast for dinner?

Over the years I've tried a lot of boxed mixes from the store then a few from scratch always in search of the best tasting pancake.

I found that the boxed mixes were very handy and quick but they always left me feeling like I had a big lump in my tummy. Making the pancakes from scratch,  like anything, always taste better but takes a bit more time and effort.

This left me wondering. How I could get the best of both worlds?

Pinterest will know!

I went online and looked at all of the homemade pancake mixes I could find. The general mixes were pretty much all the same, it's what you do with the mix when you are ready to make pancakes that's the trick.

 Here is the mix recipe

12 cups flour
1/2 cup sugar
6 tbsp baking powder 
4 tap baking soda
2 tsp salt


 This is the recipe doubled because we do really eat a lot of pancakes 


Give everything a quick whisk and store in an air tight container.

Okay, now you're standing in the kitchen, your kids are whining for food. Don't panic, here's what to do!

Take out your trusty homemade pancake mix.

In a mixing bowl add

2 cups pancake mix
2 cups milk
2 eggs
1 tsp vanilla

Whisk all the ingredients together. Don't be worried if it's a little lumpy.

A quick note...I use soured milk instead of regular milk. In this case in a 2 cup measuring cup add 2 tbsp of lemon juice or vinegar then fill up the measuring cup to 2 cups and give it a few minutes to curdle. I usually do this step first and get everything else ready. Usually by that time the milk is ready.

Now just make your pancakes like you normally would and top with your most favorite toppings! We are partial to homemade strawberry jam but, to each his own.

This recipe usually makes 12 good size pancakes.


If you have homemade mixes that are a staple in your home please share! It's always nice to take one thing off the grocery list!


Tuesday, 2 December 2014

Lollipops to Help a Cough


Candy making is something that has always intrigued me and scared me at the same time.

 I’m not afraid to say that I have an extreme lack of patience. So when it comes to heating up boiling sugar to a VERY specific temperature I usually stand at the stove wanting to turn up the heat past medium high to move things along and I look like a kid staring at the pot saying ‘is it ready yet is it ready yet?’

Let me start by saying, a candy thermometer is a MUST have for making candy. I have a cook book that says you don’t need a thermometer and goes on to explain testing the sugar for a certain stage in the candy making process.  Let’s just say, putting a drop of boiling sugar in a glass of cold water to see if it forms a ball then spreads out when it hits the bottom is not a good way to test for soft ball stage. Trust your candy thermometer and the little tick on it that says soft ball stage!

The reason why I wanted to make candy last week and specifically lollipops is because Max had a terrible cold and was coughing up a storm. This is why honey lemon lollipops were on the top of my list for the day.

I found the recipe here I’ve also pinned the link to the recipe in the 'Home Remedies' board on Pinterest, there is another recipe for flavored lollipops in ‘The Candy Man Can’ board on Pinterest so if you follow me there that's where you will find them.

The recipe is super easy and takes no time at all. Which surprised me because sometimes making candy it quite the commitment.  

All you have to do is start with the very small list of ingredients. I did have to go out and buy lollipop sticks, which you can find at the bulk barn.

Mix all your ingredients together in a pot and let it come to a boil on medium high ( I held myself back and didn't turn up the heat) until you get to the hard crack stage. 


 Then pour your very very super duper hot hot hot syrup carefully onto a parchment lined baking sheet. I was scared of burning myself but I can out unscathed, but please be careful.


You have to work fast because once the syrup starts to cool it gets really thick and hard to pour. But if it's too hot you will have a hard time pouring perfect circles. This picture is of my second batch of strawberry flavored lollipops. I did a better job on these. The honey lollipops were crazy looking shapes but tasted very good!

And there you have it kids! Homemade lollipops! 

They are a little different then store bought but that really goes without saying. They are crunchier and I would like to play with the flavoring a bit but they seem to be a hit here. You can always get kids to try candy creations without anyone turning up their noses! 

Now that I have a little more confidence with candy I may try something else.  Christmas is almost here so stay tuned who knows what I might get my hands into!


Monday, 24 November 2014

Rice Krispie Square vs Rice Krispie Treats

I'm sure I'm not the only mother who has tasted a Rice Krispie Treat and shuddered at the artificial too sweet flavor.

That's not the case with our kids though. I don't know if they like the waxy sprinkle like topping or the sweetness, but my kids want them and that is all there is to it.

I have never purposely bought a box of Rice Krispie Treats for the above reasons but Jack has come across them honestly, be it in his Halloween bag or at a birthday party.

I decided one day that I was going to try something just a little different with the old school Rice Krispie Squares and hope that it would be something I could add to Jack's lunch box without him asking me why we can't just buy the ones at the store.

I took your basic Rice Krispie Square recipe;

1/4 cup butter
40 large marshmallows
6 cups Rice Krispie Cereal
1 tsp vanilla
And the secret...regular run of the mill sprinkles!

Make your squares just like it says on the box, and once you press them into your pan...wait for it....sprinkle your sprinkles on top and push them down.


I wouldn't recommend mixing them in because depending on the sprinkles you use the colour may mix in with the melted marshmallow and make for a not so good looking treat.

I'm pleased to say these were a hit, with not only Jack but the whole family and they are now a weekly staple that we can't live without.


Monday, 17 November 2014

A Rat Tale

Before we dive into this lovely 'tail', I need to set the scene.

Weeks before we moved to the country I had asked my Dad if I could keep chickens on the property.

His response was,'of course you can dear, you can do whatever you want. I'm just worried about the rats'. To which I responded, 'what rats?'  Did my Dad have pet rats I didn't know about? I don't think chickens are a feared enemy to rats, that I know of. My Dad informed me that he had it on good authority that where there are chickens there are rats.

This comment confused me,being the amateur 'homesteader' that I am (if I can even call myself that). I wasn't sure if you got the chickens handed to you with the rats in a separate box or they materialized out of nowhere when you brought the chickens home.

Which brings me to Sunday morning.  It was just another lazy morning. Kids were still in their jammies going about there business, building armies with every single toy they had. Anthony was folding laundry, I was attempting liquid eyeliner in the bathroom. I had mentioned to my Dad earlier that our cat Duster was chasing something around the night before and was now obsessively staring at the cupboard doors under the sink. In cat behavior that means there's a mouse.

Duster has gotten very good at catching mice since we moved here. He likes to play with them until there is no play left, in the mouse that is. He left us a little treat in our room a few weekends ago. Poor mouse.

I have gotten use to the idea of mice though. The house we live in is close to 90 years old and has a dirt floor basement, it would be weird if there weren't any mice...right?

Every few weeks my Dad sets traps and catches some here and there but since the weather has really cooled down they seem to be making it into the living space. I myself have a don't ask don't tell policy because if it were up to me I'd have those cute little guys named and fed regularly in a nice cozy cage.

But Sunday was different. My Dad took Dusters sign seriously and opened the cupboard doors, there was some shuffling about and I looked over from the bathroom and said 'oh, is there a mouse?'
'No, it's a rat' my Dad replied.

Just a little aside. If you know my family you would understand that I took that as a sarcastic comment. Because that is how my family communicates. Sarcasm is in our veins and there is nothing that can really be taken too seriously and there is always time for a smart ass comment.

I rolled my eyes (which I was making a mess out of with the liquid eyeliner) and didn't think anything of it until my Dad called Anthony over to help him. Anthony had asked what he had found and my Dad said 'well either it's a rat or the biggest mouse I've ever seen'.

I will spare you the details of how the situation was handled (if you know my Dad though, use your imagination) but it was a rat (shiver) a pretty big one (gah). We're not talking a New York City sewer rat or anything but it wasn't a pet store rat that's for darn sure!

After all was said and done, my Dad came back to the kitchen and said 'See, I told you. It's because of those chickens! I've never had rats before!'

In my defense, the chickens are 40 feet from the house and I still don't believe that it's their fault.

Anyway, that was our exciting Sunday morning. I hope your was better!


Saturday, 1 November 2014

My Kitchen, the Dairy

I have plowed through a lot of milk this week, more then I thought I would but it was so worth it!

I've been staring at the dairy recipes in one of my recipe books for weeks now wanting so badly to make yogurt and cheese but to be honest I've just been afraid. Mostly of wasting ingredients because money doesn't grow on trees.

But I finally bit the bullet and made an attempt at yogurt. I read the recipe over and over making sure I had everything I needed and understood what needed to be done. Which really is something you should do with any new recipe.

Fruit at the bottom yogurt was first on my list. I was surprised at how easy making yogurt is. It's kind of like bread in a sense that there is just a lot of waiting. Waiting for the milk to come to the right temperature then wrapping up the jars of soon to be yogurt in towels and waiting for the cultures to do their thing and waiting just a little bit longer for the yogurt to cool in the fridge before you can dig into the creaming yogurty goodness you have created.


I have to say that even though I love the yogurt that I made it was very plain and very tangy. It's a far cry from the sweetened yogurt you buy at the grocery store but with a bit of homemade granola thrown on top and the fruit bottom I'll take homemade any day.

My Dad is a Greek yogurt convert that wasn't too fond of the above yogurt that I made and asked if I could try making Greek yogurt.  With my new found yogurt making confidence I agreed, found a recipe and off I went. Up until that day I didn't know that you could make yogurt in a slow cooker but seeing how you make it without one and reading how a yogurt maker works it made sense. Again, there was a lot of waiting. I started this yogurt in the afternoon because it needed 8-12 hours for the cultures to do their thing so by the time that part rolled around we were all snuggled in bed.

The next morning was like Christmas! I went running down to see if the cultures worked their magic, and they did! I haven't done any research on why Greek yogurt is different from regular but I came to my own conclusions when the recipe said I had to put the yogurt in a tea towel lined colander to drain the whey from the yogurt which after a few hours left a rich creamy Greek yogurt. I had some small tupperware containers hanging around so I spooned some homemade jam into the bottom and filled them up with yogurt and put them in the fridge to cool. I prefer the Greek yogurt to the plain, I think anyone would. It's just creamier and richer and sooooo good. I will add the link for this recipe at the bottom of the page for those of you brave enough to take the challenge!


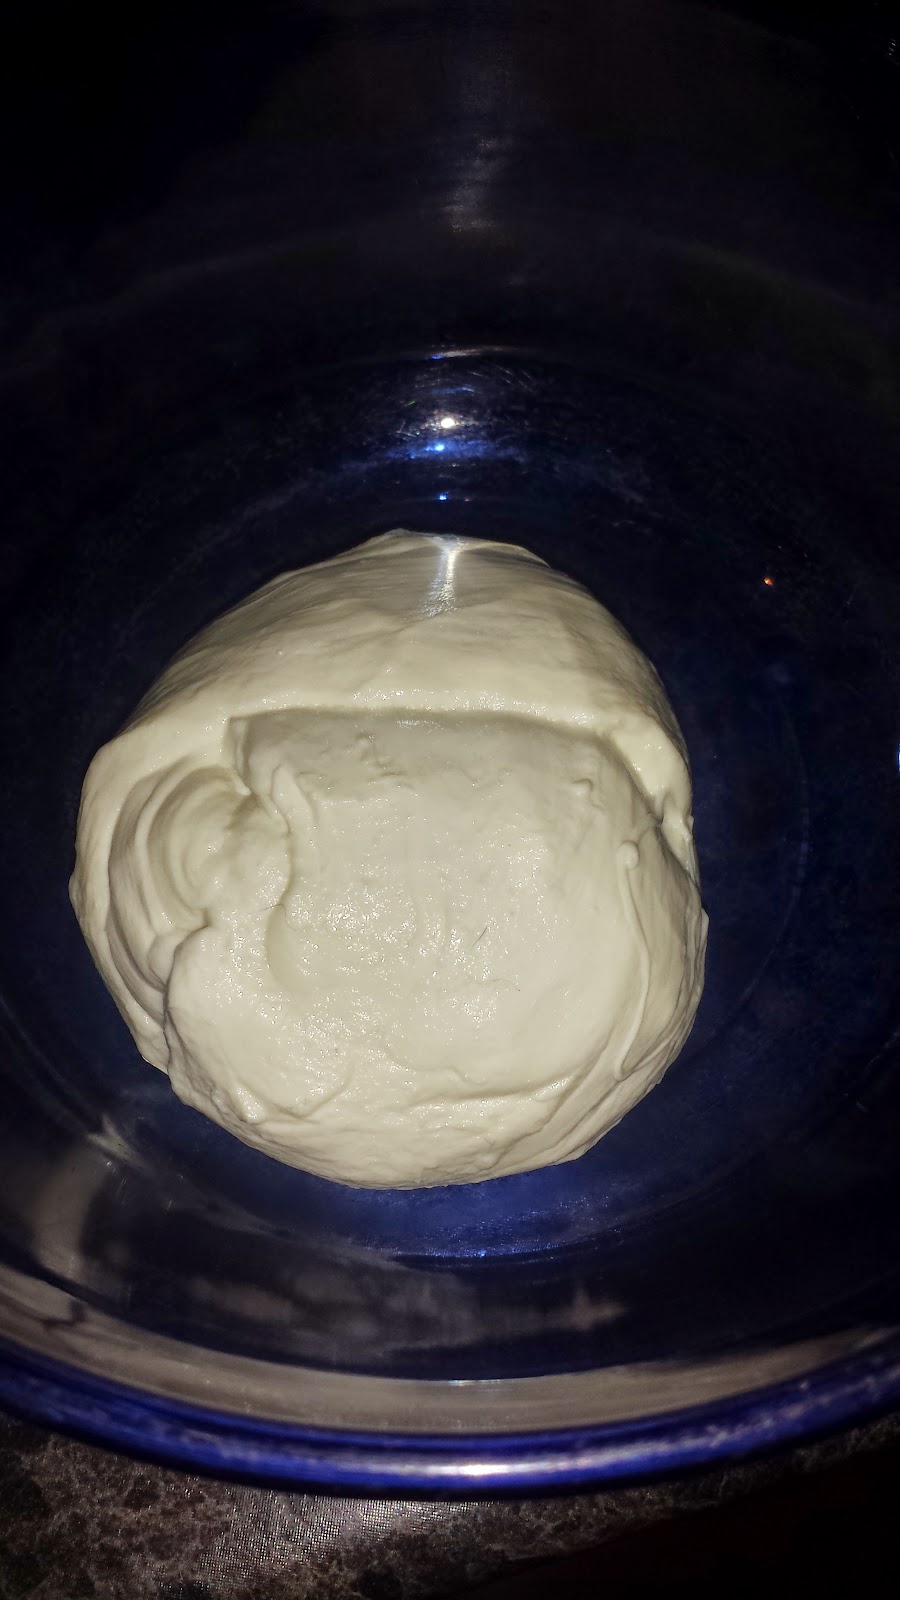
With my confidence at a very high point I decided that yesterday I was going to take on mozzarella cheese! Yes cheese! I can't even say cheese now without getting excited because I'm still on cloud 9 about what I have created. Not like I'm the first person to make cheese ever but I feel unstoppable!

With Alana Chernila's recipe book by my side (I've mentioned this book more then once I'm sure) I dove in head first. There were two ingredients I had to order to make this happen which were liquid rennet and citric acid. I ordered them from Glengarry Cheese Making Co. (http://www.glengarrycheesemaking.on.ca/) but there are a ton of places you can find these things online, thank you world wide web!

There wasn't as much waiting with cheese but there were a lot more steps to the process. Heating milk, curdling milk then curds and whey (no tuffets or miss muffets) then heating and pulling and stretching and then...cheese, a beautiful ball of cheese. Something to be enjoyed warm or cold or melted or as my kid likes it pulled like a cheese string. We are going to enjoy our cheese in a homemade lasagna tomorrow and I just can't wait.


I didn't know there was a cheese maker hidden inside me but I'm happy that I can call myself a 'dairy queen'!

But right now this blogger has to go to the store to buy some more milk.

Could there be a cow coming to My Not So Pioneer Life?!

Here is the recipe for the Greek yogurt;

http://www.overatjulies.com/2012/03/easy-crock-pot-greek-yogurt.html

A few notes - I added some of the plain yogurt I made as a starter. You can buy plain Greek yogurt at the store and use that as a starter
Instead of letting the yogurt sit in a towel in a colander, I hung mine in a jelly bag over a colander and let it drain that way

This is Alana Chernila's blog, you can find her recipe book there as well as her awesome blog!

http://www.eatingfromthegroundup.com/